I’ll jump straight into it. Although we do not need to know AWS and It is fine if we don’t have experience in handling a PBX system. As we go through the steps, it will be much easier than you think.
We are gonna need to do few things
- An account in Amazon AWS – Free Tier
- Configure AWS
- An account in 3CX – Standard Plan
- Configure 3CX
Create an AWS Account.
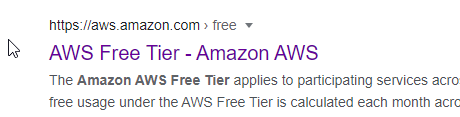
- Go to Google and type “amazon aws free tier”
- Select the AWS Free Tier Link
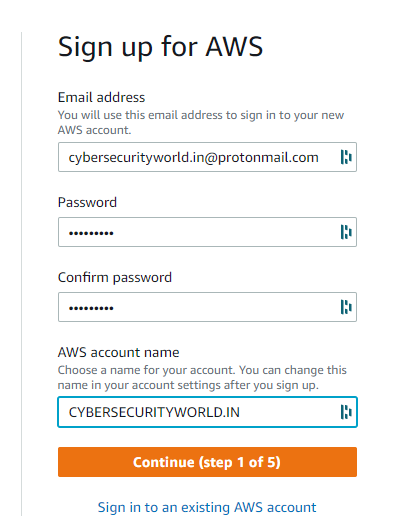
- Takes you to the AWS website and Click “Create a Free Account”
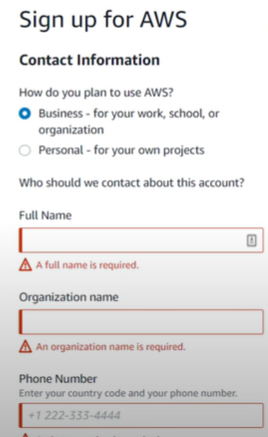
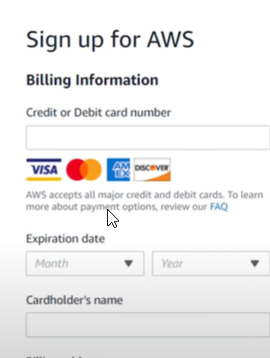
- Sign Up with your details
- Need to add credit card details and it is just for verification.
- Select Basisc Support – Free Plan
Refer to the below screenshots in the slide


Now we need to set up the AWS Management Console and configure security for accessing the AWS instances.
Configure AWS
Configure AWS Management Console
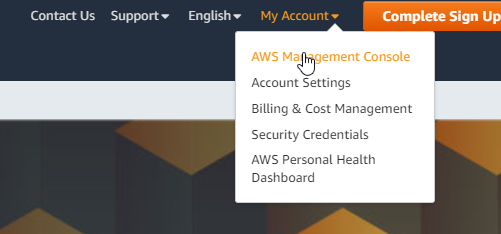
- After signing up , you will be taken into AWS Management Console.
- If not, go to My Account and click on “AWS Management Console”
- Now click on Signin in with “root user email”
- Use the email and password used to sign up initially.
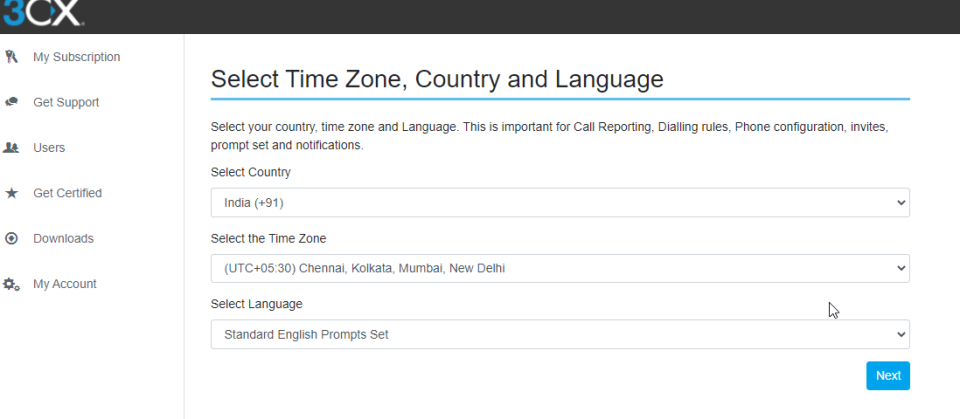
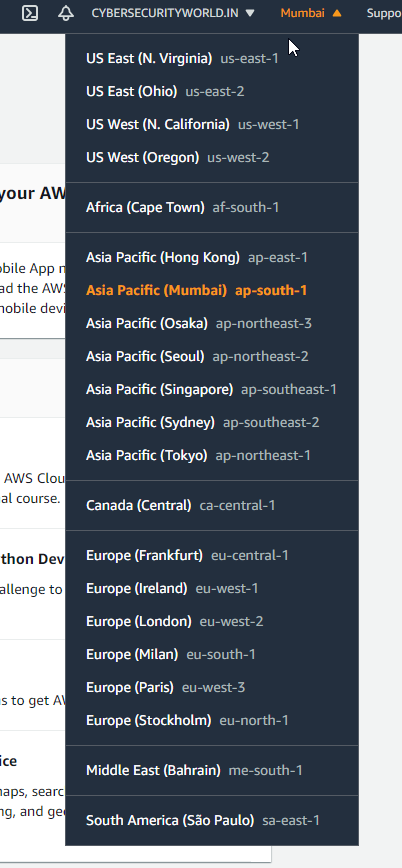
- Now in the AWS Management Console Landing Page, We need to make sure we are using the right AWS location.
- On the top right corner – Select the location Dropdown and select the location closest to your place.
Refer to the below screenshots in the slide

Create User Identity
- After changing the location, now we need to add a user
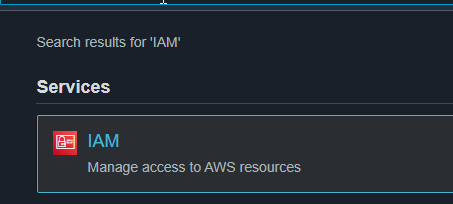
- In the top center of the web page , you should see a search bar
- Type IAM and select the IAM Services
- On the left pane, you should see Users, Click on it
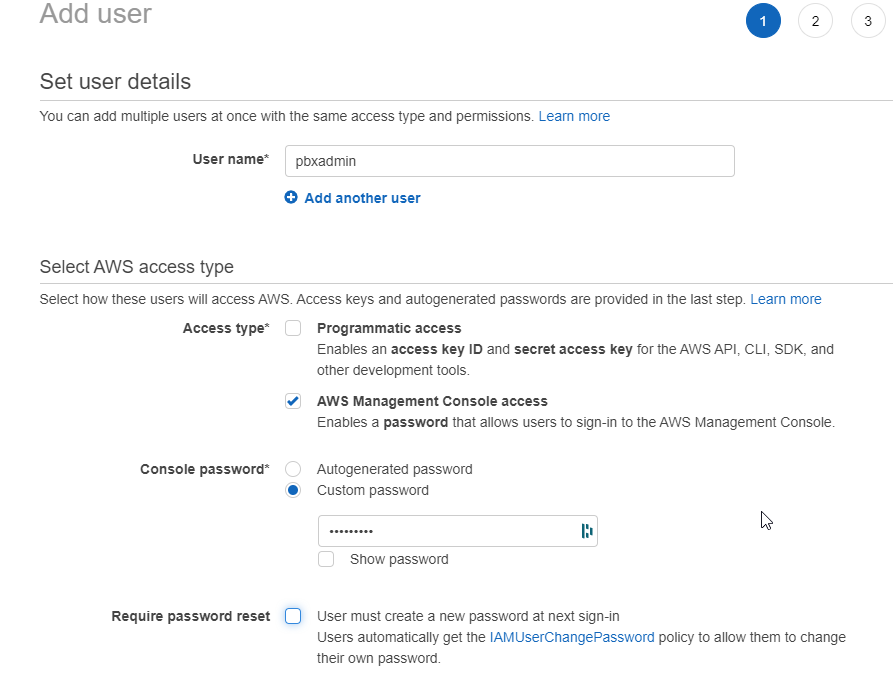
- Now click on Add Users
- Provide a username and select ” Programatic Console Access”
- Create a password and unselect ” User must create a new password”
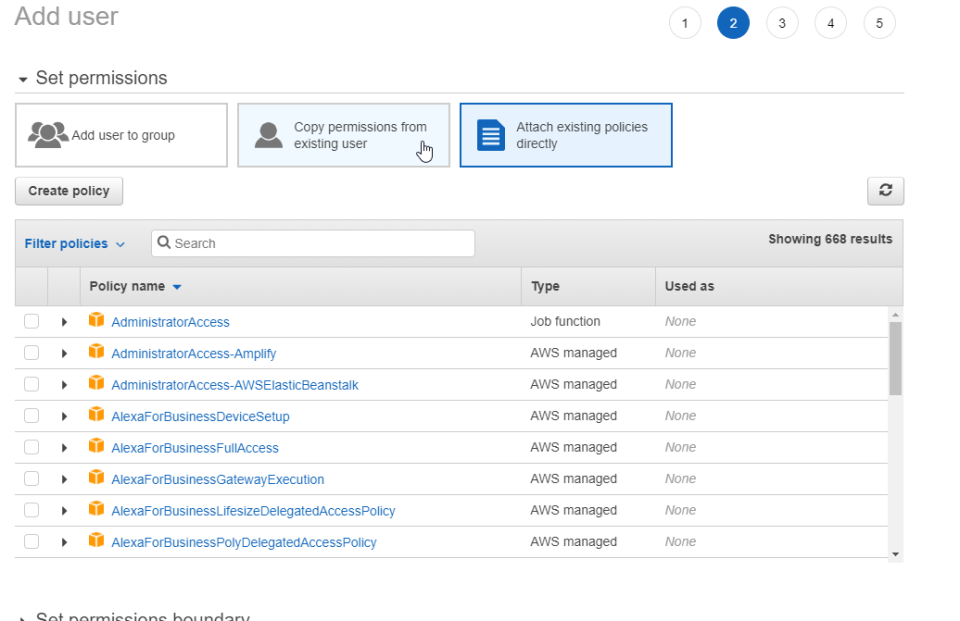
- Click next and now select “Attach Existing Policies Direcly”
- You should now see a search bar for filtering the policies
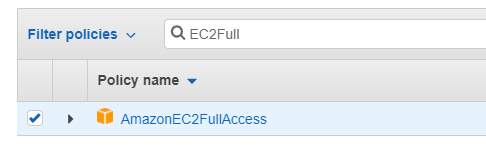
- Go ahead and search for ” Ec2FullAccess” and select “AmazonEc2FullAccess” policy.
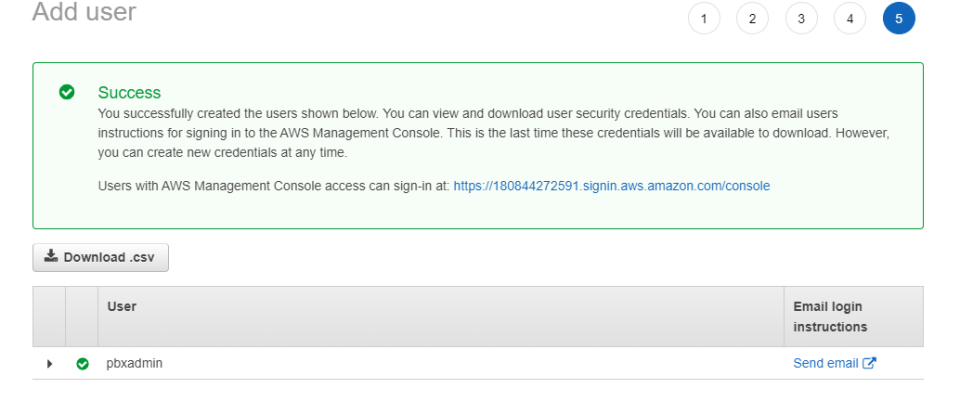
- Click on next and , we dont need tags for now , so continue to click next or create user.
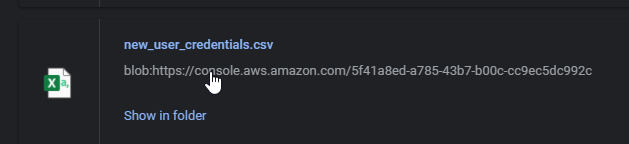
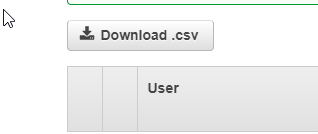
- In this page you will have to click on “Download.csv” button.
- This file contains the access Key and the Access ID for the user we created
Refer to the below screenshots in the slide


Create EC2 Instance
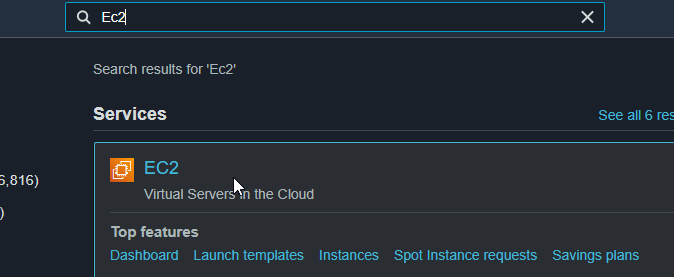
- Now on the same page, go the search bar on top and type “EC2”
- You will be landed in the EC2 page. Now On the left pane, you will see all the configuration blades
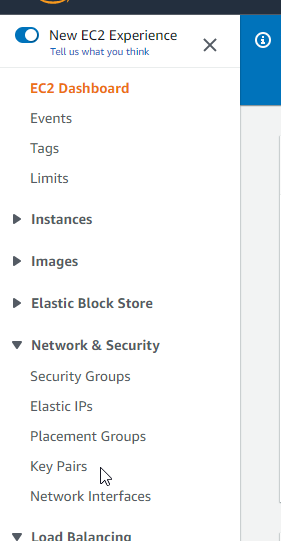
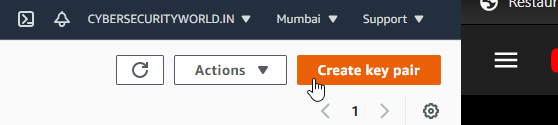
- Under “Network & Security” blade, Click on “Key Pairs”.
- Now on the top right corner, click on “Create Key pair”
- Give a name for this keypair and select “pem” radio button under “Private key file format”
- Now click on create key pair. This will be automatically downloaded to your computer.
- Save this key pair in a secure location. We might need this, if you are required to SSH into the instance.
- But for this guide, We will not ssh into the instance.
Refer to the below screenshots in the slide
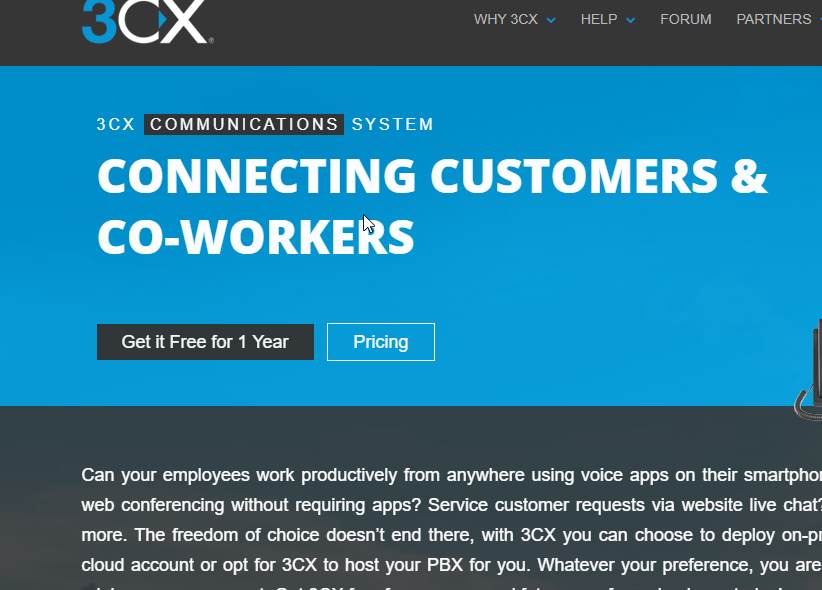
Create a 3CX Account
- Got to the 3cx website
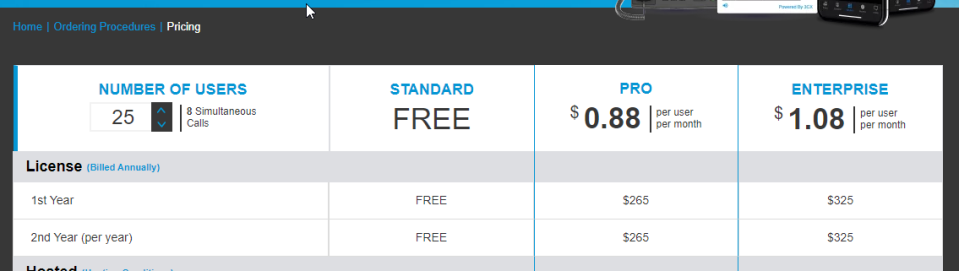
- Go to pricing and select Standard plan, Scroll down and click “Get Free”
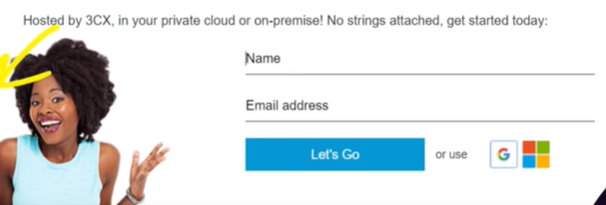
- In the next page , You will fill up the registration form as required.
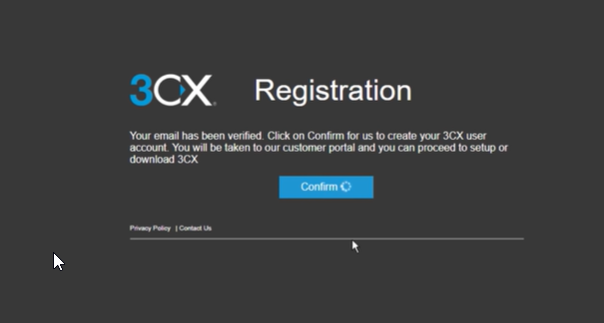
- Confirm your account by verifying the link sent your email.
Refer to the below screenshots in the slide

Configure 3CX
- Now you will be redirected to fill up forms and complete the profile
- Proceed to fill up untill you see “How would you like your 3cx”.
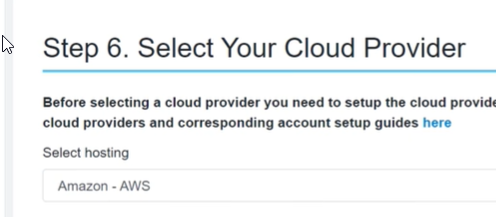
- Select ” Self-Hosted in your cloud
- Now select You cloud provider as Amazon – AWS
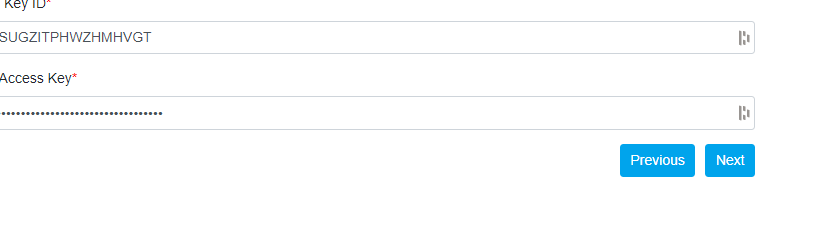
- Now you need to enter the Access ID and Access Key
- This will be in your downloaded .csv file while creating an identity in AWS
- Feed in those information and click next.
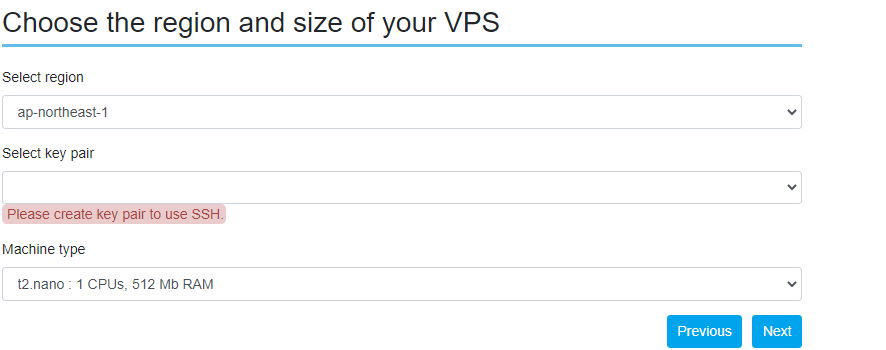
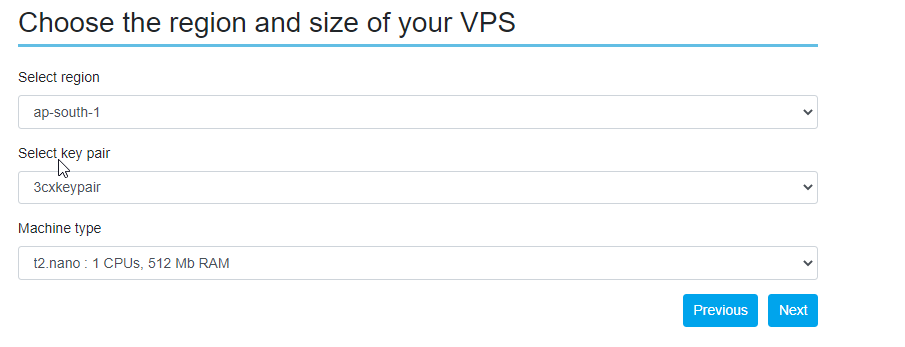
- Now , You need to select the appropriate region as seen in the AWS management console
- Once you select the correct region, you should be able to see the keypair we have already created
- Leave the machine type as it is and click next
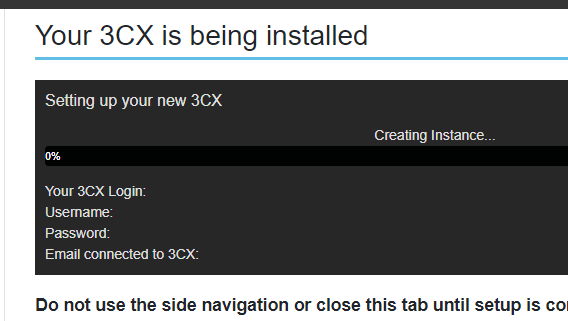
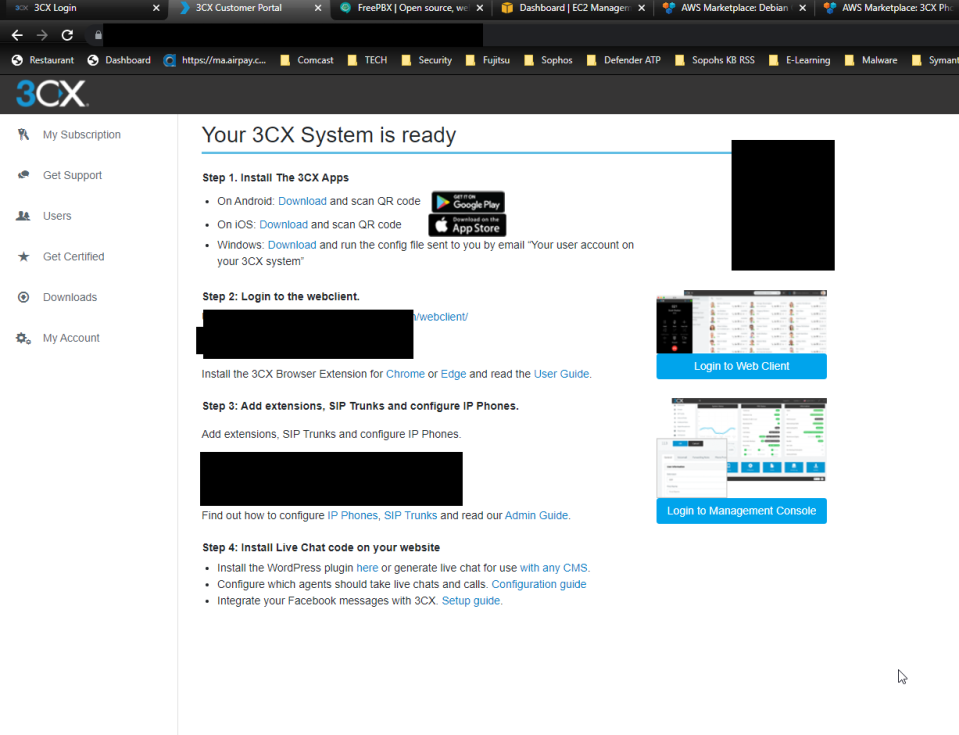
- That is it. Leave it for few minutes to deploy 3cx and you will be notifed in the same page.
Refer to the below screenshots in the slide